
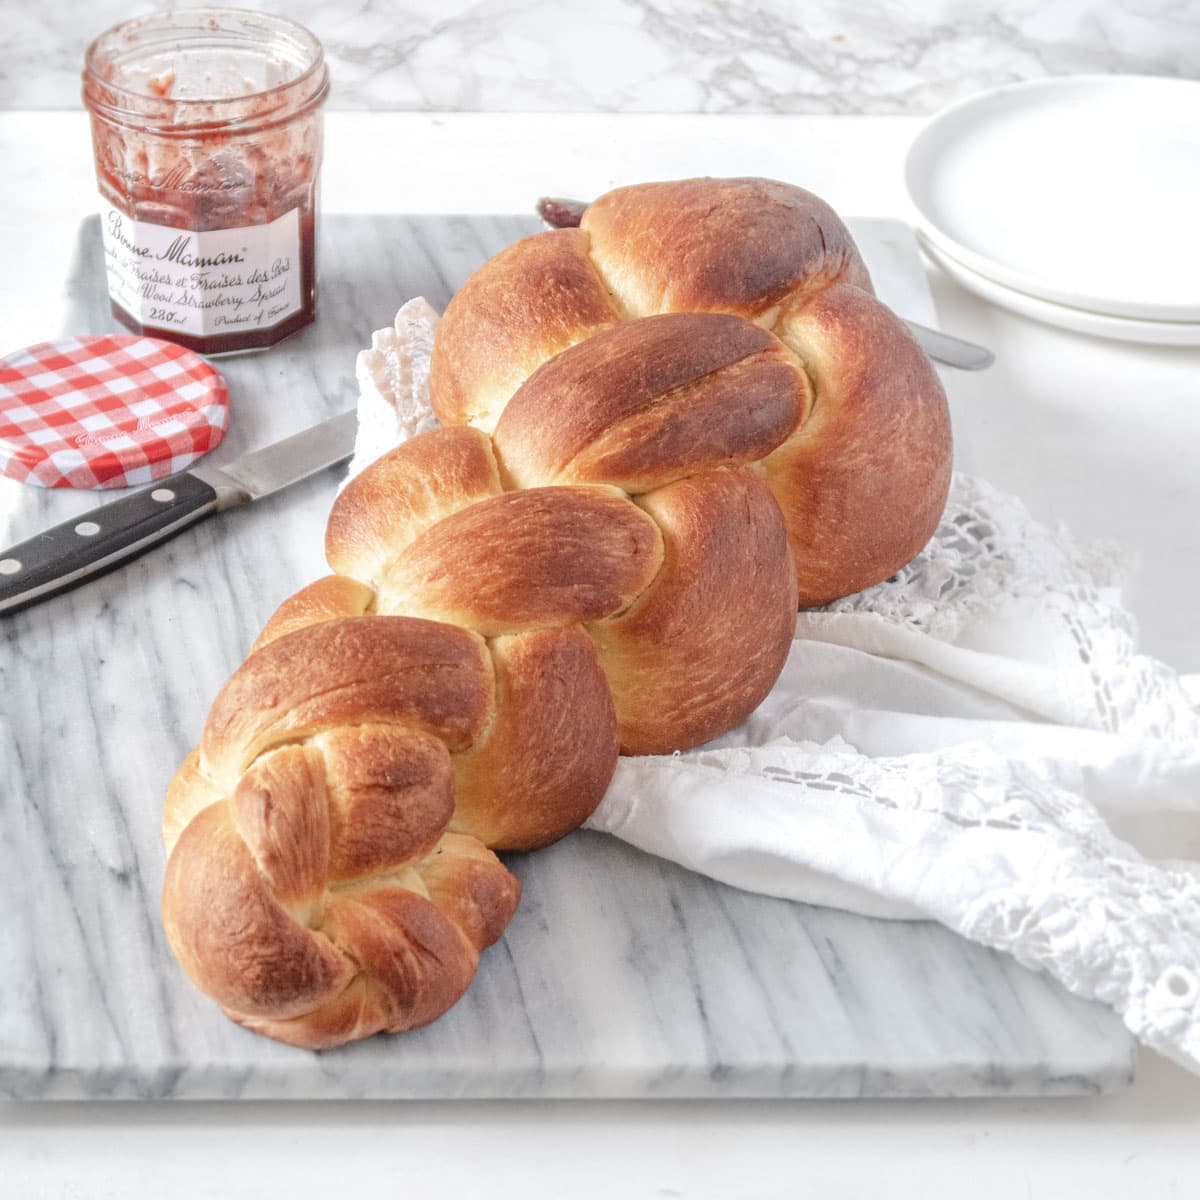
Rich and fluffy vegan butterzopf ( or classic Swiss braided bread) with have the spotlight at your next brunch.
What is a Zopf?
This vegan zopf, which means “braid” in german, is a bread that is traditionally eaten on Sunday mornings.
Of course, since this is specifically a butterzopf, it means that this bread also has some (vegan) butter in it to give it some richness. You might also find this bread under the name Tresse or Treccia.
Being an enriched dough, butterzopf is usually made with milk and butter and is glazed with some egg yolk, but this version is 100% vegan and extremely delicious.

How to braid Butterzopf
Let’s just start by saying that if you do not feel comfortable doing this type of braid, feel free to do a classic 3 strand braid.
Step 1
Without using flour, roll out each half of the dough into long strands that are even throughout and that tappers at the ends. Place the first strand of dough in a \ position and place the second one across the first in a / position to make an X shape, which gives you a total of 4 strands to braid with.

Step 2
Starting with the strand of dough that is in the bottom right, pick it up and place it on the upper left quadrant just beneath the original strand of dough. Take the strand that was originally in the upper left quadrant and place it in the lower right quadrant.
The two strands have now switched places and the strand that was at the top originally is slightly draped over its opposite in a V shape.

Step 3
Taking the strand of dough that is in the bottom left, pick it up and place it on the upper right quadrant just beneath the original strand of dough. Take the strand that was originally in the upper right quadrant and place it in the lower right quadrant.
The two strands have now switched places and the strand that was at the top originally is slightly draped over its opposite in a V shape.

Step 4
Continue repeating steps 2 and 3 until the whole bread is braided. As needed, replace the dough strands to easily see the distinctive quadrants.
Step 5
Pinch the ends of the strands together and tuck them underneath the loaf. When you transfer the break to a baking tray, plump the bread slightly by squeezing slightly both ends of the bread towards the middle.
The secret to a beautiful braid is to be consistent. It doesn’t matter which strands drape over the other (upper quadrant over lower quadrant or the opposite), as long as it is always the same throughout the braiding process.

Tips + Tricks
- This dough does take longer to kneed than a regular dough because it is an “enriched dough”. This means that it has extra fat added to it, in this case, vegan margarine. That extra fat makes the dough extra rich and delicious but also can prevent the formation of gluten. This is why you need to knead a bit more than with your regular loaf of bread to get those stretchy gluten proteins that are needed while bread making.
- My favorite place to let my dough rise for its first rise (or bulk fermentation) is in the microwave. Start by bringing a cup of water to boil, remove the cup and place your bowl of dough inside before closing the door. The residual heat and humidity will make the yeast in your dough very happy. Another good spot is in your oven with the light on.
- This Swiss braided bread is best eaten the same day, but if you end up with leftovers (which I doubt will happen), you can use thick slices of this vegan zopf will make incredible french toast.
- This recipe makes a large loaf. You could easily make 2 smaller vegan zope or even divide the quantities of the recipe in half. However, the proofing/rising time will stay the same.

How to serve Butterzopf
Spread a thick layer of the following on a thick slice of fresh zopf to reach morning perfection:
- Some salted butter
- A selection of jams. I am partial to wild strawberry jam myself
- Some deliciously sticky homemade vegan honey made out of apple juice.
- Hazelnut and chocolate spread. Being a Swiss bread, it would be sacrilegious not to mention some type of hazelnut and chocolate spread, considering the popularity of Nutella in that country.
- The next one is a bit more untraditional. Spread some butter and then sprinkle on some dry hot chocolate powder on top of it. Then dip the slice of vegan butterzopf into a glass of plant-based milk or a bowl of hot chocolate. While I myself found it weird the first time I saw one of my french friends to this to his tartine, I do have to say that frankly, it does taste delicious.

Recipe

Vegan Butterzopf
Ingredients
Wet ingredients
- 80g (⅓ cup) vegan margarine
- 440g (1 ¾ cup) soy milk , or your favorite plant-based milk
Dry ingredients
- 720g (6 cups) unbleached all-purpose flour
- 18g (1 tbsp) fine sea salt
- 7g (1 ¼ teaspoon or 1 package) instant quick-rise yeast
- 13g (1 tbsp) white granulated sugar
- 14g (1 tbsp) vegetable oil , for greasing the bowl
Glaze
- 40g (2 tbsp) maple syrup , or agave syrup
- 30g (2 tbsp) soy milk , or your favorite plant-based milk
- 30g (2 tbsp) canola oil , I use canola or another light tasting vegetable oil
Instructions
- In a small saucepan, melt the margarine over medium-low heat. Add the plant-based milk and heat until the mixture is between 122°F-130°F (50°C-55°C), or the temperature your yeast manufacturer recommends. The liquids should be the temperature of a warm bath but not too hot to the touch.
- In the bowl of your stand mixer, put the flour in the bottom and add the salt and sugar on top of the flour on one side of the bowl. Add the instant yeast to the opposite side of the bowl so that the yeast is not in contact with the sugar and salt.
- When the liquids are at the right temperature, quickly stir all the dry ingredients together before adding the liquid all at once. Using the dough hook, start mixing on low for 3 to 5 minutes, or until your dough looks like a shaggy ball of dough and is starting to detach from the side of your bowl. Add additional water or flour as needed at this stage.
- Continue kneading on low for an additional 7 to 10 minutes, or until the dough looks smooth and is slightly elastic.
- Remove the dough from the bowl and shape it into a rough ball. Gease the bowl alightly with thevegetanble oil, place the dough back in the bowl and grease the top of the dough too. Place a clean dishtowel on top of the bowl and leave to rise for 30 to 45 minutes, or until the dough has doubled in size.
- Punch out the air in the dough and place it on a lightly floured work surface. Divide the dough in 2 and roll each half into 25 to 30 inches ( 65 to 75 cm) long ropes that are a bit thicker in the middle and tapered at the ends.
- Braid the dough (see instructions in the blog post), and place on a baking tray lined with a piece of parchment paper.
- Whisk together the syrup and milk for the glaze and then drizzle in the oil while continuing to whisk until the oil emulsifies with the milk. Brush the glaze all over the braided dough, not missing any spots even around the sides.
- Leave uncovered to proof for an additional 45 minutes to 1 hour, adjusting the proofing time as needed. You will know the dough is ready when you slightly poke the dough and it slowly springs back but still leaves an indent.
- Toward the end of the rise, preheat your oven to 375°F (190°C).
- Brush another coat of glaze on top of the bread before baking for about 35-40 minutes, or until the bread is golden brown all over and when you tap the underside of the bread it sounds hollow. Optional: if you want a very shiny dough, you can even give your bread a third coat of glaze in the middle of the cooking process.
- Leave the bread to cool completely before slicing or tearing it apart. Enjoy!
Did you try this breaded bread recipe?
Don’t be shy and let me know how it went! Leave me a comment below and share a picture on Instagram ! I'd love to see your braid!

Comments
No Comments